Getting Started with Nexus API (V3)
This guide walks you through the essentials of connecting to the Nexus API v3, authenticating, and making your first requests. It combines details from the Nexus Swagger file and the help screen instructions.
1. Base URL
All API requests are made to the following base URL:
Production: https://api.nexuscenter.io
UAT: https://etaqfzu51f.execute-api.us-west-2.amazonaws.com/uat
2. Authentication
The Nexus API v3 uses OAuth 2.0 Client Credentials for authentication.
Steps to Configure
- Log into the Nexus Engagement Hub. (Admin Access Required)
Navigate to Administration Menu → Global Settings → API Configuration.
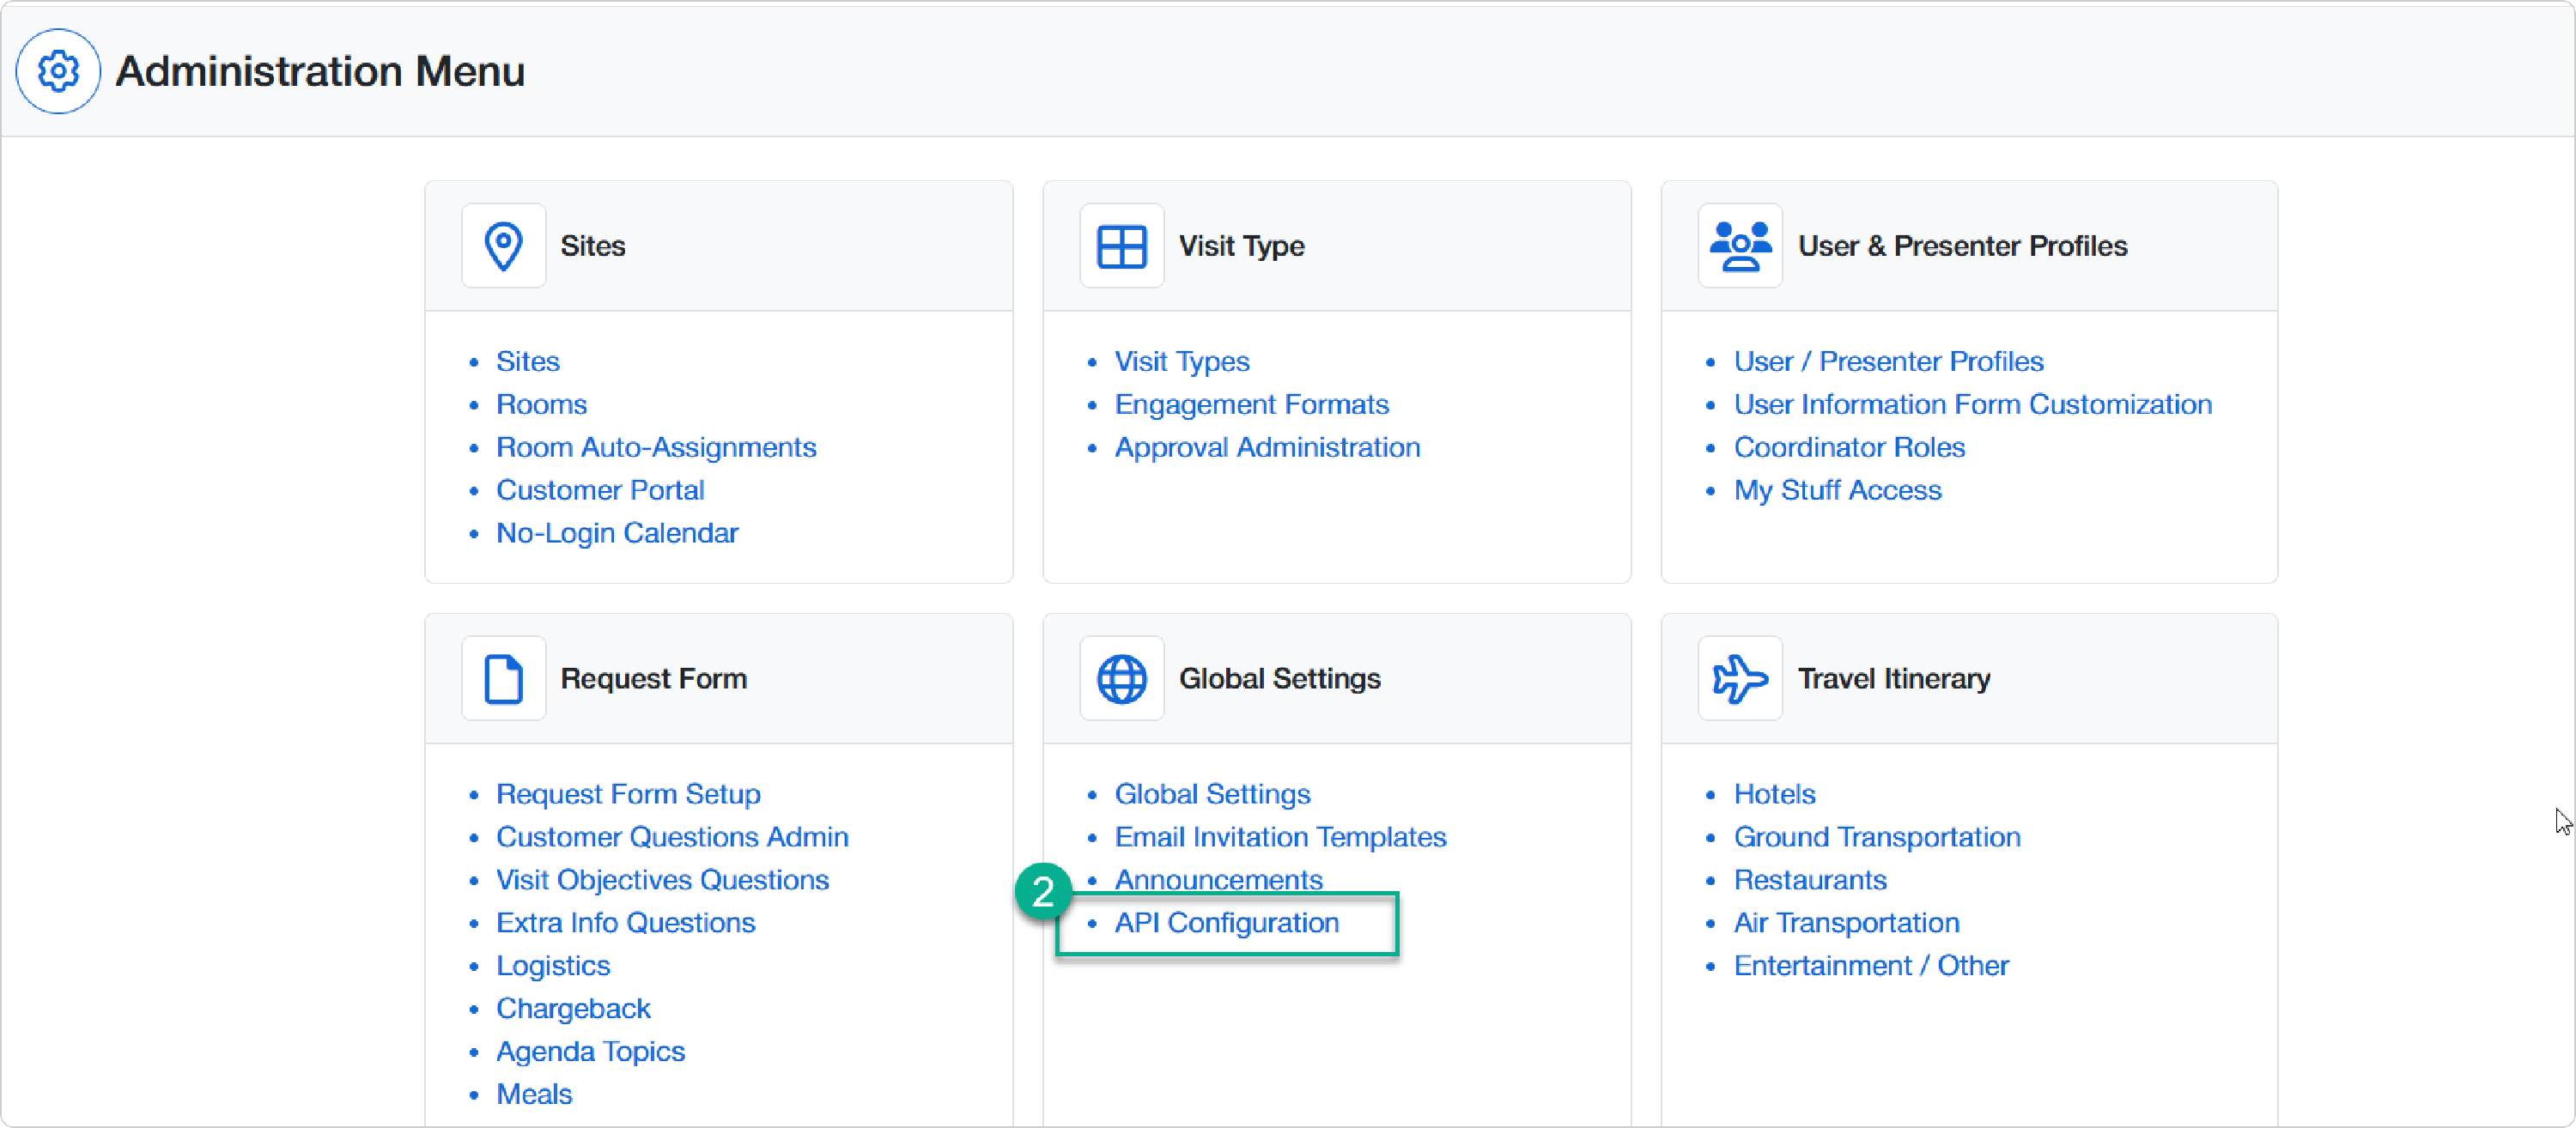
Create an API Application to generate a Client ID, Client Secret and Scope (derived from CURL).


Token Request
Use the Client ID and Client Secret to request a token from the OAuth server.
Token Endpoint (example):
POST https://<AuthCognitoURL>
Request Body (x-www-form-urlencoded):
client_id=<ClientId>
client_secret=<ClientSecret>
grant_type=client_credentials
scope=<Scope>
Response:
{
  "access_token": "<token>",
  "token_type": "Bearer",
  "expires_in": 3600
}
Include this token in all requests using the Authorization header:
Use Token URL (Access Token URL) provided.
Authorization: Bearer <token>
3. Usage Plans & Limits
From the API configuration screen, usage plans show throttling and quotas:
Rate: 100 requests/second
Burst: 200 requests
Monthly Quota: 1,500,000 requests
Plan your integration with these limits in mind.
4. Making Your First Call
Here’s how to make a simple call to verify your connection.
Example: List Countries
Request:
GET https://api.nexuscenter.io/api/v3/countries
Authorization: Bearer <token>
Response (sample):
[
  { "id": 1, "name": "United States" },
  { "id": 2, "name": "United Kingdom" }
]
5. Common Conventions
- Get vs. List:
Getendpoints return a single resource (e.g.,GET /api/v3/accounts/{accountId}).Listendpoints return a collection of resources (e.g.,GET /api/v3/accounts/statuses).
- Request Bodies: POST/PUT/PATCH endpoints accept JSON payloads. See the [Endpoint Reference] for examples.
- Query Parameters: Many endpoints accept filters like
includeInactive,languageId, or pagination params (page,pageSize).
6. Best Practices
- Always request only the data you need to stay within quotas.
- Cache common lookups (e.g., countries, industries, roles).
- Use
languageIdto retrieve localized values when applicable. - Handle errors gracefully: expect
401 Unauthorized,404 Not Found, and500 Internal Server Erroras common responses.
7. Next Steps
- Review the Nexus API v3 Endpoint Reference for detailed documentation on each endpoint.
- Set up API keys in the Nexus Admin UI and test with Postman or your preferred client.
- Start with simple GET endpoints, then expand to POST/PATCH for creating or updating resources.
By following this guide, you will be ready to authenticate, respect usage limits, and successfully interact with the Nexus API v3.